Contents
Have you ever struggled with messy or unsafe electrical wiring at home? The casing and capping wiring system offers a smart and reliable solution. In this article on the Tech4Ultra Electrical website, I’ll share my personal experience with this method and explain how it helped me protect and organize electrical wires efficiently, making maintenance easier and improving safety. If you’re looking for a professional way to install wiring that ensures durability and security, you’re in the right place. Keep reading to discover the key benefits and practical steps for using the casing capping wiring system effectively.
What is casing capping wiring?
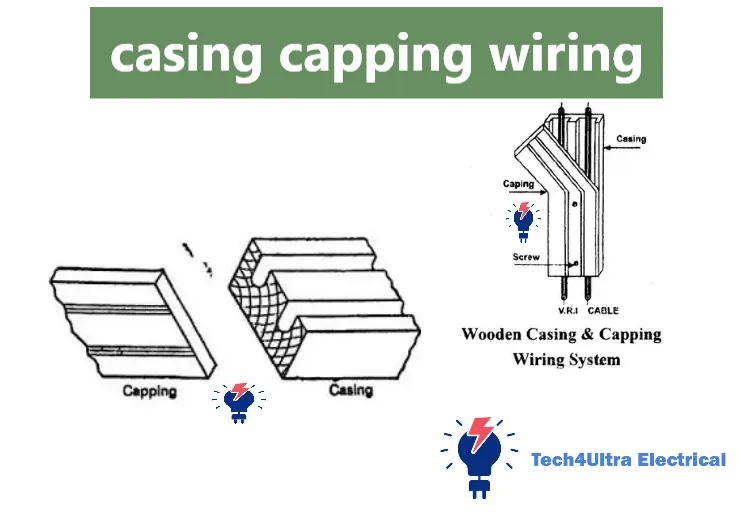
When it comes to electrical installations, the casing and capping wiring system is a popular method used to protect and organize electrical wires safely. Simply put, casing refers to the outer protective channel or conduit, usually made of PVC or metal, that houses the electrical cables. Capping is the removable cover that snaps onto the casing, allowing easy access for installation or maintenance.
This system keeps wiring neat, prevents accidental damage, and reduces the risk of electrical hazards. Unlike concealed wiring, which is hidden inside walls, casing and capping wiring is surface-mounted, making it ideal for renovations or places where embedding wires in walls is difficult or expensive.
Using the casing capping wiring system ensures your electrical setup is not only safer but also easier to inspect and repair, making it a practical choice for both residential and commercial buildings.
Read Also: System of Wiring: Types, Uses, and Tips
Components and Materials Used
The casing and capping wiring system relies on a few key components to provide a safe and organized way to route electrical wires. First, the casing acts as the main protective channel. It is commonly made from materials like PVC, wood, or plastic. PVC casing is highly popular due to its durability, lightweight nature, and resistance to moisture and corrosion. Wooden casing, although less common today, is sometimes used in specific aesthetic or traditional applications. Plastic casing is also favored for being affordable and easy to install, but it may not be as strong as PVC.
Next comes the capping, which is the removable cover that snaps onto the casing to enclose the wires inside. It allows easy access for inspection or repair without removing the entire casing. Capping is typically made from the same material as the casing to ensure a tight fit and consistent protection.
To connect different sections of casing and change wiring directions, various joint fittings are used. The T-joint allows three sections to join at a perpendicular angle, ideal for branching wires. The L-joint is used for 90-degree turns, helping the wiring system navigate corners smoothly. The bridge joint is designed to connect two parallel casings over an obstruction or gap. These fittings are essential for creating a continuous, neat, and functional wiring path.
Types of Casing and Capping Wiring Systems
There are several types of casing and capping wiring systems, each designed to suit different installation needs and preferences. One of the most common is the press and fit system. In this method, the capping is pressed firmly onto the casing, snapping securely into place. This system is straightforward, quick to install, and ensures a tight fit that protects the wiring from dust and damage. However, it may require a bit of force to remove the cap when access is needed.
Another popular method is the sliding and fit system. Unlike the press and fit, the capping in this system slides into grooves along the casing, allowing smoother installation and removal. This design makes it easier to access the wires inside for maintenance without risking damage to the casing or capping. Sliding and fit systems are often favored in environments where frequent inspections or upgrades are expected.
Modern variants of casing and capping wiring systems now come with enhanced insulation features. These improvements include better heat resistance, fire retardant materials, and thicker walls to prevent electrical leakage or interference. Such advancements make these systems safer and more reliable, especially in commercial or industrial settings where high safety standards are critical. These modern insulated casings offer peace of mind by protecting both the wiring and the surrounding environment effectively.
Standard Dimensions and Specifications
The casing and capping wiring system comes in standardized dimensions to ensure compatibility and ease of installation. Typically, the width of the casing ranges from 20 mm to 100 mm, depending on the number and size of cables it needs to house. The thickness of the casing and capping usually varies between 1.5 mm and 3 mm, providing sufficient strength and durability while remaining lightweight.
Lengthwise, standard casings are manufactured in sizes of 2 meters or 3 meters per piece, which can be cut to fit specific installation requirements. These standard lengths simplify transport and handling during wiring projects.
Industry standards often dictate specific tolerances and material properties to ensure safety and quality. For example, casings and cappings must comply with electrical insulation requirements and fire resistance standards set by organizations like the IEC (International Electrotechnical Commission) or local regulatory bodies. Adhering to these specifications guarantees that the wiring system performs reliably under normal operating conditions.
Step-by-Step Installation Process
Installing a casing and capping wiring system might seem straightforward, but following the right steps ensures a safe and durable setup. Here’s a detailed guide to help you through the process.
Tools Required
Before starting, gather essential tools such as a measuring tape, hacksaw or PVC cutter (for cutting casing and capping to size), a screwdriver, drill with appropriate bits for wall fixing, screws and wall plugs, a wire stripper, and a pencil for marking.
Surface Preparation
Begin by cleaning the surface where the casing will be mounted. Make sure it’s dry and free from dust or loose debris to ensure a strong adhesion and firm fixing. If necessary, use a level to mark straight lines on the wall for accurate alignment of the casing. These guidelines prevent crooked installations and help maintain a professional finish.
Casing and Capping Fixing Method
Cut the casing and capping to the required lengths using your cutter or saw. Fix the casing onto the wall by drilling holes at regular intervals (usually every 30-50 cm) and inserting wall plugs before securing the casing with screws. Ensure the casing is firmly attached but avoid overtightening, which might crack the material.
After fixing the casing, route the electrical wires neatly inside the channel. Avoid overcrowding the casing, as this can cause overheating or make future maintenance difficult.
Wire Routing and Sealing
Once wires are properly placed, snap the capping onto the casing to cover and protect the wiring. Ensure the capping fits tightly along the entire length. For joints or corners, use appropriate fittings like T-joints or L-joints to maintain a continuous enclosure. Finally, seal any gaps or openings using insulating tape or sealant to prevent dust, moisture, and pests from entering the system.
Following these steps carefully will result in a clean, safe, and accessible wiring system that meets both functional and aesthetic standards.
Advantages of Casing and Capping Wiring
One of the biggest benefits of using the casing and capping wiring system is its easy maintenance. Because the capping can be easily removed, electricians can quickly access the wires for repairs or upgrades without damaging walls or the casing itself. This accessibility saves time and reduces costs during maintenance.
Another important advantage is the reusability of the casing and capping components. After removing the wiring or upgrading electrical systems, the same casing and capping can be reused in new installations, making it an environmentally friendly and economical choice.
This wiring method is also cost-effective. Compared to concealed wiring that requires extensive wall cutting, plastering, and painting, the surface-mounted casing and capping system reduces labor and material expenses significantly, making it ideal for budget-conscious projects.
Additionally, the system is suitable for indoor humid conditions. Materials like PVC casing resist moisture and corrosion, protecting electrical wiring from damage in damp environments such as kitchens, bathrooms, or basements. This durability extends the lifespan of the wiring system and ensures continued safety.
Disadvantages and Limitations
While the casing and capping wiring system offers many benefits, it does have some limitations. One notable drawback is that it is not suitable for high-temperature environments. Plastic or PVC casings can soften or deform when exposed to excessive heat, making them less ideal for areas near heat sources like industrial machinery or heating units.
Another concern is the fire risk associated with plastic casing. Although many PVC materials are treated to be fire-retardant, they can still ignite under extreme conditions, potentially releasing toxic fumes. This risk means that in some applications, especially where fire safety is critical, alternative materials or wiring methods may be preferred.
Additionally, the system can make it difficult to detect faults within the wiring. Since the wires are enclosed and not visible, identifying issues like damaged insulation or loose connections requires removing the capping and thorough inspection, which may delay troubleshooting and repair.
Despite these limitations, understanding them helps in choosing the right wiring solution for your specific needs and environment.
Casing vs Other Wiring Methods
The casing and capping wiring system is often compared to other common wiring methods such as conduit wiring and sheathed cable installations. Conduit wiring involves running cables through metal or PVC pipes embedded inside walls, offering excellent protection and a clean, concealed finish. Sheathed cables, on the other hand, are insulated cables that can be installed either concealed or surface-mounted but lack the rigid protective enclosure that casing provides.
Compared to conduit wiring, casing and capping is generally easier and faster to install, especially in renovations or where wall modifications are impractical. It offers better accessibility for maintenance than sheathed cables concealed inside walls. However, conduit wiring typically provides superior mechanical protection and fire resistance, making it more suitable for heavy-duty or industrial environments.
You should choose the casing capping wiring system when ease of access, cost-effectiveness, and flexibility are priorities. It is ideal for residential buildings, temporary installations, or spaces with moisture concerns where surface mounting is acceptable. For projects demanding higher durability and safety standards, conduit wiring might be the better option.
Applications and Best Use Cases
The casing and capping wiring system is widely used in various settings due to its practicality and ease of installation. It is especially common in homes, offices, and educational buildings, where surface mounting provides quick access for repairs and upgrades without extensive construction work.
This system is also well-suited for low-voltage circuit installations such as telephone lines, internet cables, and security systems. Its protective casing safeguards delicate wiring while allowing easy organization and management of multiple circuits in one place.
Overall, casing and capping wiring offers a flexible and cost-effective solution for environments requiring frequent maintenance or changes, making it a preferred choice for many indoor electrical applications.
Watch Also: Electric Generator: How It Works, Types, and Complete Guide to Electromagnetic Induction
Maintenance, Safety, and Lifespan Tips
To ensure the longevity and safety of your casing and capping wiring system, regular inspection is crucial. Periodically check for any signs of wear, cracks, or loose fittings in both casing and capping. Early detection of damage can prevent electrical faults and costly repairs later.
Fire safety is another critical aspect. Always use fire-retardant casing materials and avoid overloading circuits to reduce the risk of overheating. Keep the wiring away from heat sources and ensure that all connections are secure to prevent sparks or short circuits.
To enhance durability, avoid exposing the casing to direct sunlight or harsh chemicals, which can degrade plastic materials over time. Proper installation with adequate spacing and using high-quality joints and fittings also contribute to a longer lifespan. By following these maintenance and safety tips, you can protect your electrical system and maintain reliable performance for years to come.
Conclusion
In summary, the casing and capping wiring system provides a practical, cost-effective, and safe method for organizing and protecting electrical wires, especially in residential and commercial settings. Its ease of installation, accessibility for maintenance, and suitability for humid environments make it a preferred choice for many.
However, it’s important to consider its limitations, such as fire risks with plastic casings and unsuitability for high-temperature areas. Always choose quality materials and follow proper installation and maintenance practices to maximize safety and durability.
For projects prioritizing flexibility, easy access, and budget-friendly solutions, casing and capping wiring is an excellent option worth considering.
FAQs
What is casing capping wiring?
Casing capping wiring is an electrical installation method where wires are placed inside a protective channel called casing, usually made of PVC, wood, or plastic, and covered with a removable cap. This system organizes and safeguards electrical cables while allowing easy access for maintenance.
What precautions will you take in casing capping wiring?
Key precautions include using fire-retardant materials, avoiding overcrowding the casing with wires, securing casing firmly to surfaces, and keeping wiring away from heat sources. Regular inspections are also important to detect damage or loose fittings early to maintain safety.
What does capping electrical wires do?
Capping provides a protective cover over electrical wires housed inside the casing. It prevents dust, moisture, and physical damage while allowing easy access for repairs or upgrades by snapping on and off the casing.
What is wood casing and capping wiring?
Wood casing and capping wiring uses wooden channels and removable wooden covers to enclose electrical wires. While less common today, it is sometimes chosen for aesthetic reasons or in traditional buildings, offering a natural look while protecting wiring.
What is another name for casing capping?
Another common name for the casing and capping wiring system is the “surface wiring system” because the wiring is installed on the surface of walls rather than concealed inside them. It is also sometimes referred to as “surface-mounted wiring” due to its easy accessibility and visible placement.
What are the three types of wiring?
Generally, the three main types of wiring used in electrical installations are:
- Casing and Capping Wiring: Wires are placed inside a protective casing on the surface, covered with removable capping for protection and access.
- Concealed Wiring: Wires are hidden inside walls or ceilings, offering a clean appearance but making maintenance more challenging.
- Surface Wiring: Wires run openly on the surface of walls or ceilings without casing, usually protected by conduit pipes.
Why is PVC casing capping preferred over wooden casing capping wiring?
PVC casing and capping is preferred over wooden casing because PVC is more durable, lightweight, and resistant to moisture, corrosion, and fire. Unlike wood, PVC does not warp or rot over time, making it safer and more suitable for electrical wiring protection, especially in humid or damp environments.
How to identify 3 way wiring?
Three-way wiring typically involves two switches controlling a single light or group of lights. You can identify it by checking for three wires between the switches: a common wire (usually black), and two traveler wires (often red and black or red and white). Testing with a voltage tester while toggling the switches can also help confirm a three-way circuit.
Which type of wiring is mostly used?
The most commonly used wiring method in modern buildings is concealed wiring, where cables are hidden inside walls or ceilings for aesthetic appeal and safety. However, casing and capping wiring is popular for surface installations due to its ease of access and maintenance, especially in renovations or commercial spaces.